Pages

Showing posts with label birthday. Show all posts

Friday, November 2, 2012

An Under the Sea Party

A few weeks ago (sorry for late posting) we had A's second birthday party.

We were so lucky that it turned out to be such a beautiful day. I remember last year it was so hot, no one wanted to go outside (we had the party at our apartment). I knew we wouldn't be able to host the amount of people we were expecting at our apartment this year, so we decided to do it at a park in town instead.

This was a different park than we did J's party at, so it was new to me. A few days before the party, A and I went up there to scope the place out. That's when I realized that a few projects I had planned weren't going to work and I had to tweak them a bit.

But, enough about that. Now lets see some pictures...

 
This is an ABC book I made for A as a gift. It's filled with a few of her
pictures from the past two years.


And the beautiful birthday girl
 
After all of her friends arrived all A wanted to do was play, play, play! Her favorite activity of the day... swinging on the three seater swing.
 
I hope you had as much fun reading about her party as I did planning and creating it.
 
 
 *Ocean printables found here*  *ABC book purchased here*
*Crab cake tutorial found here*  *Fish bowl tutorial found here*
*Sushi tutorial found here*  *Octo-dogs tutorial found here*
*Banner purchased here*

Thursday, October 18, 2012

Happy Birthday Big Girl!!

That's right, this cutie is 2 years old today!! Time to celebrate :)
 
And here's one of her reaction to her balloon surprise this morning :) She kept pointing and saying "Balloooon!!"

Thursday, October 4, 2012

6 Layer Lego Brick Cake!!

That's right, J's cake was a whopping six layers! But not just any 6 layers would do, oh no, I had to go above and beyond.

First item of business was the overall look of the cake. Originally I wanted to do a "brick" style cake and have them stacked (like this), but J wasn't sold on that. So we sat down at the computer and went through a few different Lego cake styles. At that time he picked this one and I was determined to get it done. But of course, the week before his birthday we came up with a different style, now I was going to make a Lego figurine head. Honestly, I was happy about this change. I knew that it would be more work to make and cut all of the fondant for the first one. But now I had a new issue to fix. Since the outside of the cake was going to be plain (compared to the original one) I would need to make the inside pop and be the real "wow" factor.

At that point I started to research "rainbow" cakes. I knew with his color theme (red, blue, green and yellow) a rainbow colored cake would look really neat. But the ones I kept coming across (like this and this) just seemed too girly. They were cute, but not really what I would think for a boys Lego party.

That's when I started to think outside the box and wanted to come up with something on my own, something different.

That's where this came from.
Pretty cool, huh? I think so.
 
It was actually pretty easy to make, too.
 
First it started the same way the other rainbow cakes I researched did. I mixed my (store bought) cake mix in a big bowl (per package instructions) then divided it into four other bowls. Since I knew I was making six layers I just doubled the amount of cake batter for two colors.
Then I just poured my batter into my six round cake pans as usual and baked per package instructions. Nothing special. Once they were baked I let them cool so I would be able to handle them better. **I probably should have slightly frozen them, that way they would have been easier to cut**
 
Then I cut them like you would do for a checkerboard cake. Don't know what I mean? Well here's a not so detailed description.
 
First you need to make a template of your cake. To do this I just traced the bottom of my cake pan onto card stock. Now you have a large circle. Next you'll want to draw a smaller circle inside your larger one, leaving about 2 inches between the lines. Then you want to draw another circle inside of that one. I'm not sure how confusing this sounds, but what you wind up with is a "bulls-eye" (think Target symbol, ha ha). Now you'll need to cut your template so that you only have the middle ring left. Here's a picture of my template on my cake.
See what I mean? Okay, so now you need to place your template onto your cake, try to center it as best you can. While holding it still, cut around your template. Make sure you cut along the outer edge of your template as well as the inner edge. After you make your cuts, carefully separate you rings. Now you will have this.
Outer ring, middle ring, inner circle.
 
Do this for all six cakes. Now you will have this.
At this point I decided to gather all of my rings by size and color and line them up. Now comes the fun part, putting the cakes back together. You can do this in any order you choose, but be mindful of how your layers will stack. Try not to place two similar colors on top of each other. Once mine were put back together this is what they looked like.
I then just stacked them as you would a normal layer cake. Place your bottom cake layer, then add icing, then your next cake layer, icing, cake, etc. until you have all six layers stacked. Now all you need to do is finish icing the outside of the cake. I'm not a cake baker or decorator, so don't look to me for tips on that. If you need help there just Google, that's what I have to do, ha ha.

So now that your cake is assembled and iced it should look something like this (this picture was taken after we had already eaten some from the back, that's why it's leaning so much). To add the face I just used a tube of icing that was made for writing. It allowed me to control where I was putting it. Since I was using black, I didn't want to mess up.
Here are a few more inside shots, just because I think they're cool.
There you have it. A super easy and really cute Lego cake. Enjoy!
 
 
*As usual, if you have any questions, feel free to ask them in the comments*
 

Wednesday, September 26, 2012

The Big Party

So, on September 15th we finally had J's birthday party. Although his actual birthday was in August, I held off his party until school started, hoping kids would actually show up. Well, that didn't happen. J isn't a very social kid, so I know he doesn't have many true friends in school, but I was hoping that by him handing out the invites near the beginning of school would get to the parents easier. Oh well. We still had a blast with those who did attend.

Now here comes the fun part! All of the details.

I worked on this party for quite a while. I knew (by pushing it back) I would have to manage my time between J's party and A's party (next month) so I wouldn't get behind on either.

Like I've mentioned many times now, I love planning parties. They don't always happen exactly like I plan (but really, what does?) but I still am very proud of my work.

For J's party we decided to have it at a local park. I was origionally worried about the heat but thankfully the weather held out and it was a decent day. We also had plans to go to the splash park after we ate cake and opened presents.

I appoligize that my photos are horrible (and lacking). I'm the worst at taking pictures, especailly at my kids parties. I'm usually the one busy making sure things are going attempting to go as planned. The photos I did manage to take don't really do the party justice, there was so much more than what I was able to capture.

These are the Lego men marshmallow pops that I made. I was very nervous about making them, but I think they turned out super cute. Again, sorry you can't see many of the faces... I was in a hurry taking the picture. I origionally bought two (one for each side of the table) large bowls to fill with M&Ms to use for displaying them, but I didn't buy enough so the pops weren't standing upright. So I decided to put them in a smaller cup I had left over and that seemed to do the trick.

These cups were filled with multi-colored Jell-o. Once they were set out I think half of them were gone the first minute. They were so refreshing on this warm day. I really wanted to attempt to make layered Jell-o but wasn't exactly sure how to go about doing it. I decided to just give it a try and see how it would turn out. I just made one flavor at a time, per package directions, the allowed them to cool. The only thing I did different was I had to do the "quick set" version of the instructions, so they would be ready in time for the party. I also attempted to be even more brave and do a diagonal layer effect. You can't really tell from my crappy picture, but they actually turned out pretty cool. Also, to decorate the cups, I attached to each one a sticker I purchased got for free from vistaprint.

These were popcorn balls that I attempted (and failed). I just couldn't get my proportions of marshmallow mixture and popcorn correct. I think if I had taken better measurements and calculated things out better, they would have turned out great. Needless to say, the few you see gone in the picture were the only ones eaten... I also added in mini M&Ms to add some color. 

Now for decorations. I wanted to keep them simple (and cheap, haha) so I just made some homemade streamers (tutorial found here) that hung from the pavilion rafters. These hung above the tables where everyone sat to eat. Again, this picture doesn't do them justice, you just have to take my word for it :)

Now this was a project I came up with on my own, homemade lego blocks. Basicly I just bought floral foam, tissue paper, and clear beads all from the dollar store. I wrapped the foam in tissue paper and then glued the clear beads on top in a lego-type pattern. Super easy and cost about $5 to make enough for three tables.
Here is a picture of J's banner (that I also got for free from vistaprint!) hanging above his cake I made. I really wanted the cake to be the showcase of the party and I think it was. It makes me so happy to see the excitment on my kiddos face when he gets to see the special things I make for him. It makes it all worth it in the end. It also doesn't hurt when I get the same sentiment from adults, too :)

And here is a picture of the birthday boy with his cake. Yes, the cake was bigger than his head! Six layers to be exact. Also, I plan to do another post about how I made the cake, so stay tuned. You'll never guess what the inside looks like...
 
As far as the other things I did/ made for the party that weren't available for photos when I finally got around to taking them were:
 
Rectangle pizza- cheese and pepperoni (to look like lego bricks)
Lego brick pinata- tutorial here, mine looked just like this one but blue without the pull strings
Homemade rectangle platters for the food- covered in theme matching tissue paper
 
One of the highlights of the party was the science experiment I did with all of the kids. I wanted to do something different, that all of the kids could help with, and I also needed it to fit into baby food jars I had saved to use for J's party. So what did we make? Slime!
 
J and I had made some a few weeks ago as a summer experiment and we both loved it so much. I knew it would be a hit with the kids at the party (ranging from two to nine years old). I also knew I wanted to turn the baby food jars into lego men heads, but didn't want to paint them, incase I decided to put something edible in them. So my solution was to draw faces on each of the jars and then tint the slime yellow.
 
Of course I didn't think the whole project through (color wise) and as we were making it, it looked like runny eggs. The kids loved it but the adults were turning green, haha. I made sure to give each kid a special task to help with the project, then when it was time to mix I allowed them all to put their hands in. The look on their faces when they felt it for the first time was priceless (I guess my memory will have to do for that image). After it was all mixed I divided it equally into all of the jars and sent one home with each of the kids.


Friday, August 31, 2012

The Big 9!!

So during my extremely long absence, my little man turned nine! I wonder if it's still okay to call him little, haha. At this point he's almost up to my shoulders (and I'm tall) and nearly 100 lbs. Not so little any more, but to me he will always be my little man.

Since his birthday is at the very end of summer, we usually have a hard time getting school friends to show up at his parties, so this year we're doing something different. I have decided to push his party back until September so hopefully more kids his age will attend. So as of now, his big party is in two weeks.

I'm sure I've mentioned it before, but in case I haven't, we're doing a Lego theme this year. I can't tell you how excited J is for this party. He's been a Lego fanatic for as long as I can remember. I will admit, though, that he got his fascination from me. I have fond memories of sitting on the floor playing and building with Legos for hours. Although the Legos of today are nothing like they were when I was young (all of 15 years ago, haha). Now you can buy complete sets (that cost an arm and a leg) and build pre-designed items. I like the concept, but I much prefer to free build, which is why I haven't bought J many sets. That, along with the price tag, plus the fact that they get destroyed as soon as we build it.

But anyways, this post is about his upcoming party. I love to plan parties. If I knew I could do it, I would love to make a career out of it. But for now, I'm all about making this one day super special for my favorite little man.

I've taken to Pinterest a lot for this party. Mainly because I have a vision for what I want, but it's just hard to see it all and Pinterest allows that. Already I have completed a few projects that I have pinned, but I also branched out and created a few of my own. That's the best part for me. Being as creative as I can, even though I may be taking someone elses idea, I try to add my own spin to it.

Another big goal for me is to do this party as cheap as possible (no surprise there, huh?). To me, the less I spend on everything, the more I can do. For that reason I shop for most of my party supplies at the dollar stores. Many of the items may look cheap, but if you add a little creativity to them, they can become really awesome. Oh, I can't wait to share all the fun things I have planned for this party. But it will have to wait for now. I'm having issues uploading photos, so once it's fixed I plan to do posts on each item, so stay tuned.

Monday, March 12, 2012

Party plans already?!

Yes, it's official, I'm crazy. Well, I won't go that far. Although I have already started planning both birthday parties for J and A. But I have a great reason, I swear.

For those who know me, know that I love to go all out when it comes to birthday parties for my kids (here's A's party from last year, followed up with a how-to). And in the past, this means spending a ton of money. Well, not this year. Since I have discovered the wonderful world of couponing for groceries, I decided that I didn't need to only save money there. Why not find great deals for anything I need.

So once I saw that vistaprint was having an "everything free" event, I knew I needed to jump on it. Yes, they do often have wonderful sales and free items, but I saw things that I don't usually see, so I got very excited.

I had already decided the themes for both A and J's parties, and also began my extensive Pinterest search for ideas, so that part was already done. Now was the fun part, find free items to use with those themes. First was A's Under the Sea theme (chosen because of her favorite book). I searched vistaprint until I found the cutest set of mermaid themed items. From there I was able to completely personalize each item.

Here's what I bought. And yes, all for free (I did have to pay for shipping, but still managed to save over $50!)...
(1) 3'x18" Personalized Vinyl Banner
(10) Personalized Thank You cards
(10) Personalized Note Cards
(20) Envelopes
(24) Small Personalized Stickers

Next up is J's Lego party. I don't have his items yet because I had to completely personalize it (they didn't have any Lego themed items on the website). Also, I had to do two different transactions in order to get both sets for free. Otherwise, I would've been charged half price for the second set (still not a bad price). I did order all of the same type of items, so J's set will look very similar, just with a different theme.

In the end, all items totaled $20, but I managed to save over $100 (85% savings)!

So yes, party planning has officially begun, but so has party savings. Can't wait to see what other deals I'm able to find. Oh, and did I mention how much I love to plan parties!!

Wednesday, October 26, 2011

Details, details...

So, now that I have some extra time on my hands, I decided I need to start writing about all of my party prep for A's party last week.

In this post I'll focus on the decor.

**Photo Timeline**

I knew I wanted to showcase A's first year throughout the party area. In order to do this I hit up Pinterest for some ideas. While doing a quick search for "photo timeline" I was quickly bombarded with so many ideas to choose from. Since I had taken A's picture every month on the 18th I knew I wanted to display them in a nice way. So I printed each photo onto 4x6 paper and wrote her age and the date at the bottom of each one. I was very proud of myself for keeping up with taking her photo each month so this was a special project for me.

I decided I would put the timeline on the wall as soon as you entered the party area. That way, as soon as guests arrived, they were taken back though A's first year of life. I arranged the photos in order from her birth up until the day of the party (I meant to take a photo that morning of her in her party dress, but time got away from me). Once they were up, I was pleased with how it looked, but didn't feel like it was enough. So I grabbed purple and green cardstock and cut out some crowns and frogs (images found by doing a google search). I decided to place a crown above each monthly picture so it looked like she was wearing them. The frogs (in three different sizes) were arranged below the photos. This also showcased the theme of the party, Princess and the Frog.

**Hanging Pom Poms**
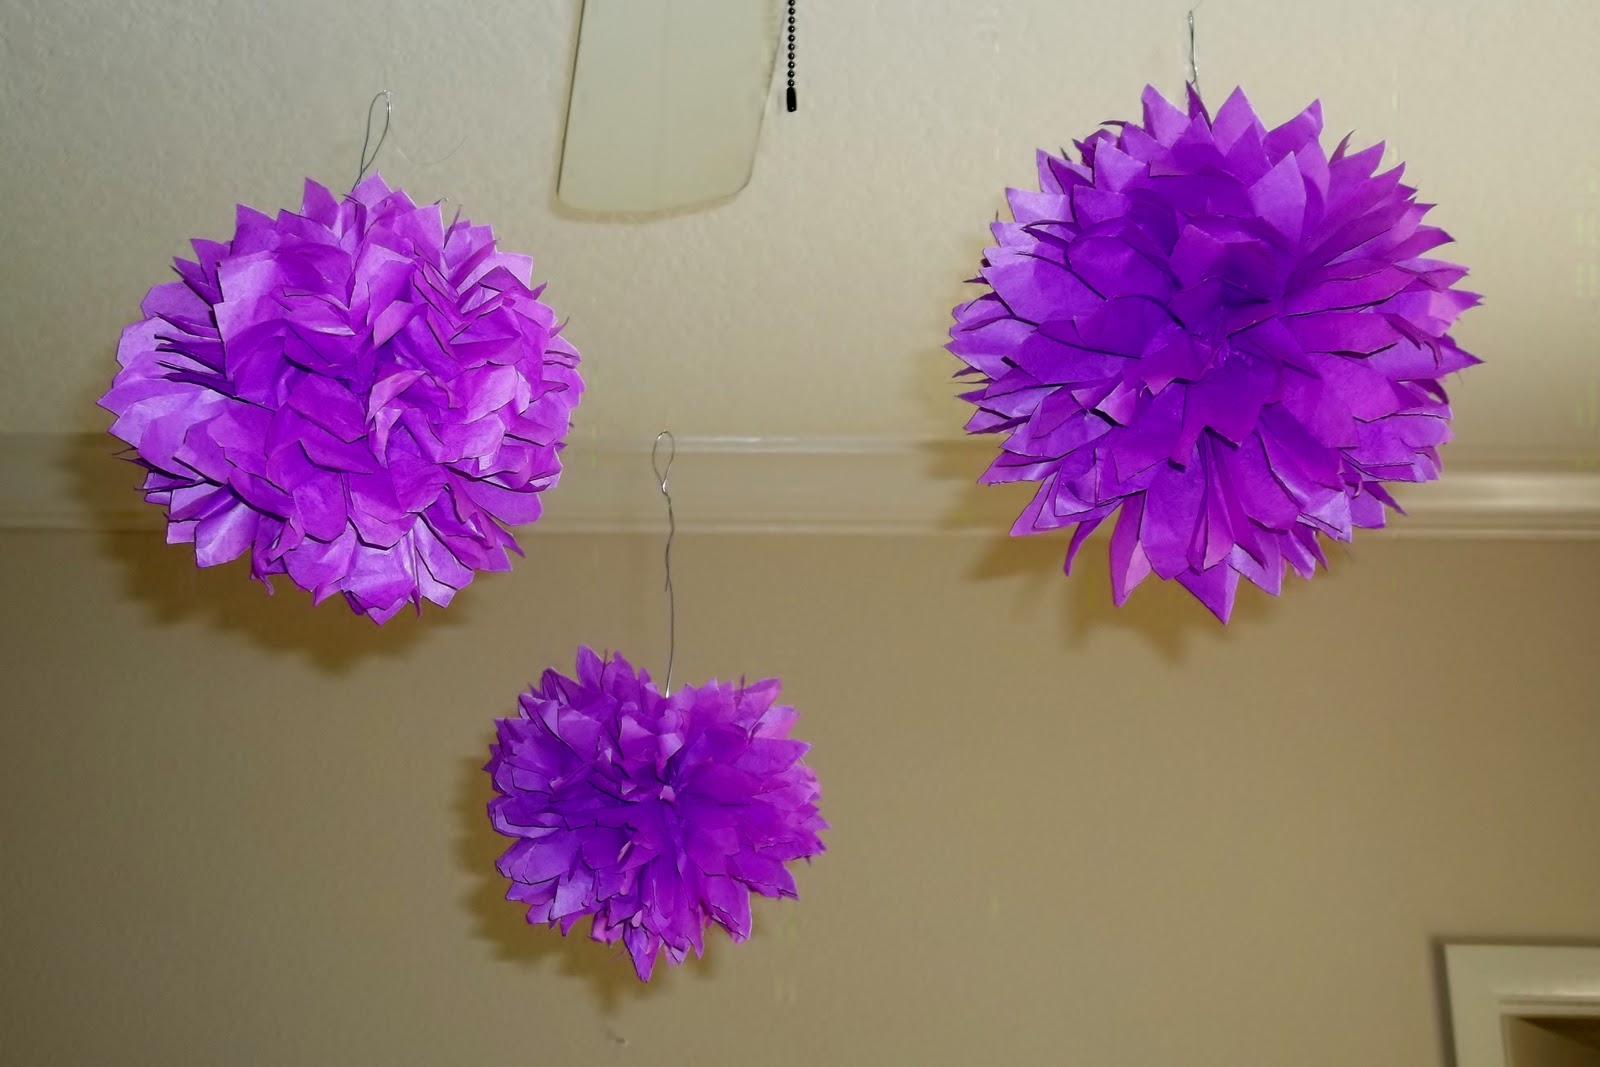
Photo taken before they were hung
Months before I began to do any party prep I came across this post on Martha Stewart's website. I instantly knew I wanted to make them. Although I wasn't sure then what our them would be, I just knew I had to included them somehow. I was a little intimidated by the instructions so I hit up my friend Pinterest for more ideas and hopefully a better/ easier how-to. Without any real success, I decided to dive right in and wing it.

First thing I had to do was to find tissue paper. I knew I wanted to make them in purple, but wasn't having any luck finding a color I liked. Most of what I found was pastel and I knew it wouldn't work. Then one night I stopped by Target on my way home from a friends birthday celebration. I wasn't on the lookout for anything particular, but when I came across a package of green, purple, and pink tissue paper for $1 (!!) I knew I had hit the jackpot. The only down fall? There was only one package left, so I had to make my pompoms much smaller than what I had hoped for.

There were five sheets of each color so I cut them in half to double it up. By doing this my pompoms became more round than had I not. I figured I'd take better shape over size. After all, you can't really complain when you have a cute set of decorations for $.33.

**Number 1 Sign**

I was really excited when I came across this idea on another blog. I instantly knew I wanted to try to make it for A's party. Although there weren't any instruction on how to do it, I figured it couldn't be too hard. And in fact, it was quite simple. All I needed were basic supplies like cupcake liners, glue, ribbon, and poster board.

First I drew a basic 1 shape on the poster board. I made sure it was large enough so you would still be able to see the exact shape of the number once the liners were on. Then I folded each cupcake liner in half twice and glued the tip (which was made by folding them) onto the board. I started off by gluing them down randomly all over the poster. Once I had a few on, I let them dry, then I would go back and fill in some more. I repeated this step about three times just filling in as I went to make sure there weren't any holes. After an hour, this is what I had. Cute, huh?

**Pom Pom Topiary**

This was another take on the pom poms I made earlier. Since I also had green tissue paper in the package with the purple I figured I wouldn't let it go to waste. For these pompoms I didn't cut the paper in half so they are about twice the size as the hanging ones, but definitely not as full and round. I wasn't too worried about their fullness because they were going to be "planted,"  therefore I only needed them to look cute from one side. Speaking of them being planted. I got this idea when I came across purple take-out containers at the dollar store for $1 each. Instantly the thought came to mind and I bought the rest of my supplies needed (which were styrofoam and filler, I also needed skewers which I already had at home).

Since the containers were rather large (about five inches tall) and my skewers weren't very long, I first added a handful of filler to the bottom. Then I placed in my styrofoam piece and topped it off with the rest of the filler. I attached the pompom to the skewer with the wire (see tutorial) and then stuck the skewer into the foam. Tada! And at $4.50 each (there were two of them) they really made the table look nice.

**Table Backdrop**

This was, by far, the easiest decor to create. In my dining room I have a mirror hanging on the wall. Since I didn't want strange reflections as people took pictures, I decided to cover it with purple and green steamers. Easy-peasy! Although you can still see through a bit, it's much better than the alternative of taking a picture of yourself...

**Smash Cake Backdrop/ Banner**


Another super easy (and cheap) decor item. After searching Pinterest (yet again) for "smash cake photos" I came across a picture of a baby sitting in front of a white background enjoying his/her cake. I liked how it looked more "studio" and less baby-just-eating-in-a-highchair. I wasn't sure how I was going to pull it off, but then I came up with the idea of using a table cloth for the backdrop. So back to the dollar store I went to purchase a $1 white table cloth to hang up for A to eat her cake on/ in front of. Once I hung it up, I noticed it looked a little plain and kind of out of place. So that's when I decided to make a banner to put across the top. I cut circles out of purple and green paper and wrote out the message "Ariana Grace is one" with one letter on each green circle. I hung the banner high on the cloth so when she did her smash pictures it wouldn't be in the background (I wanted it all white).

*Stay tuned for even more party posts. I have many more "secrets" to share :)

PS. I just enterd this post into a party, come join in on the fun here:

Tuesday, October 18, 2011

Happy Birthday

Last night I put a baby to bed. This morning a toddler woke me up.


This past year has been filled with so much joy, sadness, love, and frustration, but I wouldn't have changed it for anything.

I can still remember everything leading up to the birth of A. The last doctor apointment I had, when we were sent down to L&D, so excited to meet our baby girl. Then to be told that everything looked fine and we could go home, just to return again in three days for my scheduled induction.

Trying so hard to deal with the Pitocin induced contrations for as long as I could without the epidural. And finally breaking down at 9 o'clock at night, when I was told I was still at 2cm. Then, less than two hours after I was given the epidural, my sweet baby girl arrived at 10:57pm. We were even able to capture that precious moment on video.

Coming home so she could meet her big brother for the first time. Poor J, he had no clue what to expect, even though we tried our best to prepare him ahead of time.

Experiencing every milestone with her, from the first smile, to her first laugh. Sitting up, crawling, standing, and now walking, all special memories I will forever hold close to my heart.

Ariana Grace, you have changed our lives in ways you'll never know. We love you so much.

Mommy, Daddy, and Bubbub

Monday, October 17, 2011

Party-palooza!!

So, the party was great, a huge success. I'm still getting calls about how nice it was which kind of makes me blush. I'm not too good with the compliments, but I do like to hear them :)

The days leading up to the party were crazy. I thought I had everything pretty much done except for the final touches, but I was sadly mistaken. Thursday night I was going over my lists (I had about three of them) just to make sure I wasn't forgetting anything and that's when I realized I forgot to add about 20 things to it. Not major to-dos, but I tend to get hung up on the minor details. So this then added just that much more stress on me. And no, planning a one year old's birthday party shouldn't be stressful, but I'm a perfectionist so it makes it worse.

But I did what I do best and made yet another list. My husband thinks I'm crazy because I kept saying I needed to make a new list just as I finished one. But lists keep me sane, well at least a little. So, anyways, back to the story.

On Friday I had plans to get up in the morning and run to the store for all of my last minute items to make all of the food. This is when the husband informed me that he wanted to go get his hair cut (in all fairness, he really did need it). So I waited at home for him to return. By now it was time for little Miss to go down for her first nap. I guess she had other plans since he played in her crib the whole time. So I figured I'd kill time by searching on Pinterest. Bad idea. I found so many new ideas that I wanted to incorporate into the party. So I quickly made a list (yes, another one) and went off to the store.

Once I got home it was time to get busy. My plan was to make all of the desserts on Friday, and finish them up/ frost all the cakes Saturday morning. I was so proud of myself for sticking to the plan. I was finished with all of the food prep by ten o'clock Friday night. Although, not all day was spent on just baking though, I still had two three four other lists to finish. Add into that, little Miss A never went down for her morning nap and only a 30 minute afternoon nap. So see wasn't a happy camper all day and all she wanted was her mommy. I was finally able to call it a night around midnight and boy was I happy to see my bed.

Saturday morning started slow. A woke us up around eight o'clock (her usual) and we ate a quick breakfast. Then it was time to really get busy. Today the clock was really ticking and I was now on a time limit. First item of business, making A's smash cake. Since her theme was Princess and the Frog, I decided to make her a frog cake. Thanks to Pinterest, it was easy to find a tutorial on just how to do it. As time went on, I began to see even more little things that needed to be done. So I would  do a little cake stuff, then a little party prep, then back to cake stuff. Back and forth until it was go time. And sadly, I still wasn't 100% ready when my guests started to arrive, but I was close enough so it didn't look like a complete mess.

Now it's picture time!!

Getting ready to party!!

The dress I made for little Miss

A few of the decorations


Monthly photo wall

Princess tutu, her frog, and our reason to celebrate!

 My table decorations

The whole display

The frog smash cake I made for the Princess

She was so excited to dig in!!

Finger licking good :)